

TI PS - TRICKS
& MORE HAPPY CUSTOMERS
2000 uses for WD40
May seem strange to find this here but I feel everyone should have the chance to use this list containing so many uses.
May seem strange to find this here but I feel everyone should have the chance to use this list containing so many uses.
| wd-40_2042538679.pdf |
|
CURTAIN TRACKS AND ACCESSORIES Over the years Curtain Tracks have come a long way from just a simple plastic track and runners. There are so many styles to choose from and the designs can transform the complete look of your room. If you choose poor quality curtain tracks they will make hanging your curtains a long and difficult job. Saying that, high priced tracks may not meet your budget. In today's market the choice is excellent and you can achieve the look you wish and at a price you can afford. Curtain tracks are basically functional, but if you choose the correct style they can enhance the scheme of any room within your home, and also make the work of hanging your curtains effortless. Before you rush out and purchase your fabric, please, take time to think things through. You need to consider which type of track system or pole you are going to use. The positioning of your track will determine the length of your curtains. Fixing your system first is very important. FOR INFORMATION CONCERNING CURTAIN POLES PLEASE USE Contact Form at the bottom of page. |
CHOOSE THE TYPE OF HEADING FOR CURTAINS.
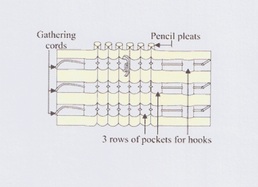
Your choice of heading will also effect the width of your curtains.
1. Standard Gathering Tape... best used with small windows and light weight fabrics. Width of fabric is 11/2 to 2 times the track/pole length. 2. Pencil Pleat Tape ...has the appearance of rounded pleats and can be from 11/2" (39mm) to 6" (150mm) deep. Allow 2 to 21/2 times track width 3. Triple Pleat Tape ... gives you a triple pleat with a space. Allow 2 to 21/2 times the track width. 4. Cartridge Pleat Tape...gives you spaced cylindrical tube shaped headings, soft and even folds. This is best for thicker fabrics such as Velvets and heavy Brocades. Curtain tapes are far more adventurous these days, and you can get a huge range of different types of heading to allow you to style your window to suit your room perfectly. SO MANY TRACKS TO CHOOSE FROM.
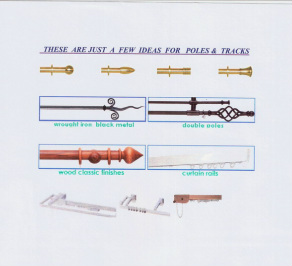 WOOD - PLASTIC - CHROME FINISH - GOLD &
SATIN FINISH.
|
HOW TO CALCULATE FABRIC REQUIRED.
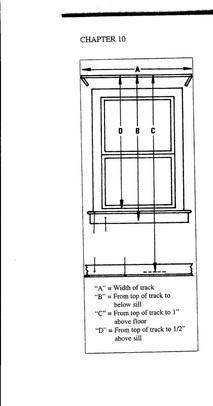
NUMBER OF WIDTHS.
First measure the width of the track/pole. Add extra for any desired overlapping in centre. Usually about 6" . Multiply track width by 11/2, 2, 21/2. according to the heading tape you have chosen. Divide the answer by the width of the fabric, and round up to the next whole number, to give you the total widths required. If it is an odd amount of widths, then you can cut one width in half. Use one width into each curtain. Extra material will be required if a pattern is used because of pattern drop. If using Poles measure from the bottom of a ring to length required. If using Tracks, then the track should be covered by the finished curtain heading. To determine length required hang a piece of heading tape, using your hooks and then measure from top of tape to the drop required. For the measurement complete add 8" (20cm), this will allow 2" (5cm) for the top turnings and 6" (15CM) for the bottom hem.. This is the measurement for 1 curtain now multiply by quantity of widths also remembering any pattern drop allowance. Need help, simply use the contact form at bottom of page. |
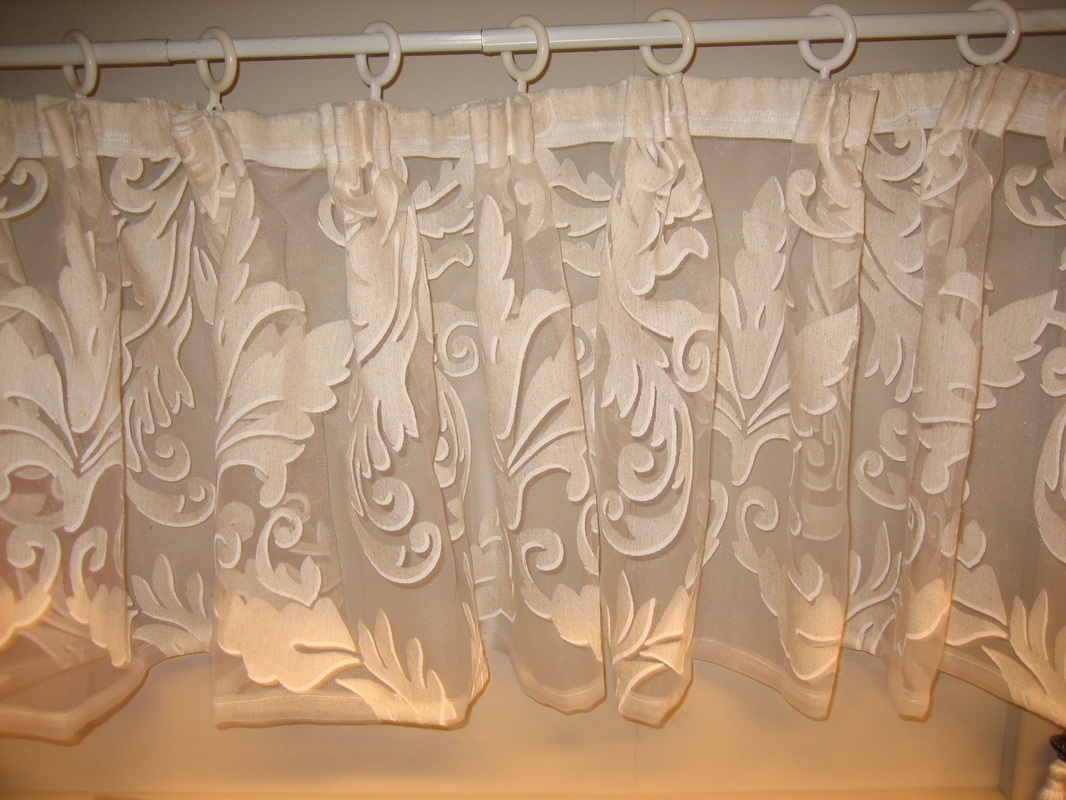
SIMPLE VALANCE STYLE.
Believe this or not, but this style needs no separate pole for the valance. This style is easy to make up but the curtains do not open, but, need to have tie backs. A SIMPLE CAFE CURTAIN.
This style of curtain can be hung on rods or expanding wire. It is also suitable for a window within a door. 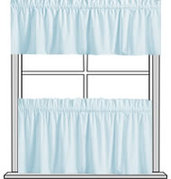 |
Napped Fabrics
The term“with nap” is used on sewing patterns and instructions; it affects the amount of yardage you need, how the pattern is cut, how the item is sewn and pressed, and even how the final garment is laundered. This guideline will help you understand napped fabrics. For sewing tips and garment care information, A fabric with “nap” has gone through a finishing process that raises the fiber ends to the surface where they are clipped, brushed or left upright. This creates surface texture that in turn creates a soft hand, a heavier fabric and, usually, a warmer fabric. The raised fibers of napped fabrics all lie in one direction; this makes the fabric look and feel different when touched or viewed from different directions. If you rub your hand from cut end to cut end, one direction feels smooth and the other doesn’t. It’s very important to lay out pattern pieces so the nap runs in the same direction on each garment piece or you’ll end up with odd color shading as well as other problems. |
Pile fabrics are woven or knit with an extra
yarn to create their raised surfaces and are not true napped fabrics because they do not undergo a finishing process. They do, however, have “nap” and are usually grouped with napped fabrics. For the most part, pile fabrics require the same fabric preparation and sewing techniques as napped fabrics. Napped fabrics include melton, flannel, serge, camel’s hair, sweatshirt fleece, brushed denim, mohair, lamb’s wool and synthetic suedes, just to name a few. Pile fabrics, which require a “with-nap layout,” include velvet, velveteen, corduroy, fleece, terry cloth, fake fur and bouclé amongst others. To determine if a fabric has nap, fold it right sides together matching the cut ends, then turn one corner back (1). Check that the layers look and feel exactly the same. If they don’t, the fabric has nap. If you still aren’t sure, use the cutting layout and sewing suggestions for nap fabric, just in case. Pattern Selection The beauty of garments made with napped fabric is the texture and hand of the cloth and the way the surface reflects light. Simple designs are most suitable for napped fabrics. |
Do's & Dont's for Napped Fabrics.
( Satin, Corduroy, Velvets, Flannel)
A simple design is much better to use as napped fabrics are very bulky
They also require special techniques when sewing.
Try to avoid top stitching and too many buttonholes ( they can distort the fabric)
Press Studs and Loop with Buttons are much better
Do any size alterations to the pattern before placing it on fabric.
For facing fabrics use a light weight.
Fabric Preparation
When laying out the pattern pieces for cutting, all the pieces must run in the same direction. Position the
upper edges of all the garment pieces at one end, with all the lower edges toward the opposite end (2). Extra fabric is generally required in order to lay out the pieces this way. If the fabric is expensive, layout the pattern pieces on muslin or the floor to determine the exact yardage, or check the pattern envelope for a napped fabric layout and yardage requirements. To preshrink the fabric, follow the manufacturer’s care instructions on the end of the fabric bolt. Consider the fiber content as well as the fabric structure. Synthetic suede, wool, camel’s hair, velvet, velveteen, fake fur, etc. usually require dry-cleaning. If the garment will be dry-cleaned, you must dry-clean the fabric before cutting it because the fabric could shrink.
If the fabric must be stored for an extended period of time, pin it to a hanger to avoid fold marks. Try to avoid excessive handling, which could crush the pile or distort the nap.
Tip: To revitalize fabric that has been stored, hang it in a bath room and fill the room with steam. Do not touch the fabric while it is damp, or you could leave a mark.
How To Use the Nap
Napped fabrics are normally cut so that the nap runs down the garment, from the top down toward the
lower hem. This feels softer, and the fabric tends to pill less and wear better . However, when the nap runs up, the color is richer.
Short-nap fabrics, such as corduroy and velour, can be cut with the nap running up to achieve a richer, deeper color and a more interesting texture.
Outerwear fabrics with heavy and longer surface fibers, such as fleece and camel’s hair, should be cut with the nap running down, so the pile is smooth and the garment repels moisture better.
Before laying out the pattern pieces, test for nap direction. You can choose to lay out the pattern pieces
in either direction, as long as you are consistent. If you are looking for design interest, cut certain pieces, like patch pockets and yokes, in different directions to create shading.
NOVEMBER Tips
When cutting silky fabrics, do you have a problem of fabric movement.
Here is a simple tip to make that frustrating job so much easier.
Download the pdf.
Here is a simple tip to make that frustrating job so much easier.
Download the pdf.
| cut-slippery-fabric_original.pdf |
DECEMBER Tips
Whether you're making a raincoat, place mats, a child's apron, or styling a rainy-day tote or lunch bag, sewing with vinyl coated fabrics is great fun. Many fabrics come pre-laminated, or you can add a slick coating to your own fabric. Some fabric companies make coordinates, where the same fabric may be available in both a vinyl-coated version and a non-coated style. Laminate Your Own Look for an iron-on vinyl, available in glossy or matte finish. Wash the base fabric without any fabric softener or dryer sheets,
to ensure that all finishes are removed and the vinyl will adhere securely. Press out any fabric wrinkles. Press-on vinyl comes with a protective sheet, which doubles a pressing cloth for the application process. NEVER touch the iron directly on the vinyl, as it will melt. Follow the manufacturer's instructions for fusing the coating to the fabric. Both sides of a fabric can be encased in vinyl if you prefer, offering double the protection.
Ready-made Laminates
There are several types of slick coated fabrics available—oilcloth and laminated or coated cottons are the most commonly used for fashion and accessories, though the principles of sewing these slippery fabrics are all the same.
Pattern Choices
Since most vinyls and laminates may not be very flexible, it's best to select a pattern without a lot of fitting—darts and gathers should be avoided, as should set-in sleeves. Look for raglan or cut-on sleeves for easier sewing. Check to be sure your fabric is on-grain as with a vinyl coating, there's no way to straighten the patterning if it's obviously askew. If it is askew, follow the design patterning instead of the fabric grain line.
Cutting & Marking
Begin with your laminates and vinyls at room temperature. Medium- to heavyweight versions can be quite stiff if they're the least bit chilly. Remember, pressing isn't an option so lay the fabric flat for a day or two before using. Cut most vinyl items as a single layer. If a piece needs to be cut on the fold, double the fabric wrong sides together to avoid sticking, or place a sheet of tissue between the layers. Keep any pins within the seam allowances only, as pin holes are permanent. It's best to mark with chalk, as tools like a tracing wheel will damage the fabric surface. Water-soluble markers may not work with the vinyl coating, and thread marks will leave permanent holes. Test on a scrap before deciding which method is best.
|
February TIPS 2019.
Piping , do you think that this is best left out, so play safe and just sew simple seams. You are wrong, read this pdf file and enjoy making your cushions etc: - with a professional finish. Enjoy. |
| ||
MARCH TIP.
This is very handy to keep by your sewing machine.
Get a piece of card and down one side measure in centemitres 4 cm. then place a mark and cut into it a v then move down to 6cm and repeat . You can do this up to 10cm.
On the other side do the same but in inches , if you work in inches, as many do.
This is so handy when sewing or pinning hems, turnings etc" -
Projects and happy customers. click on image to move on or enlarge.
|
|
|
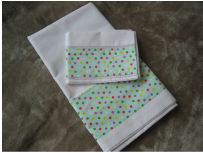
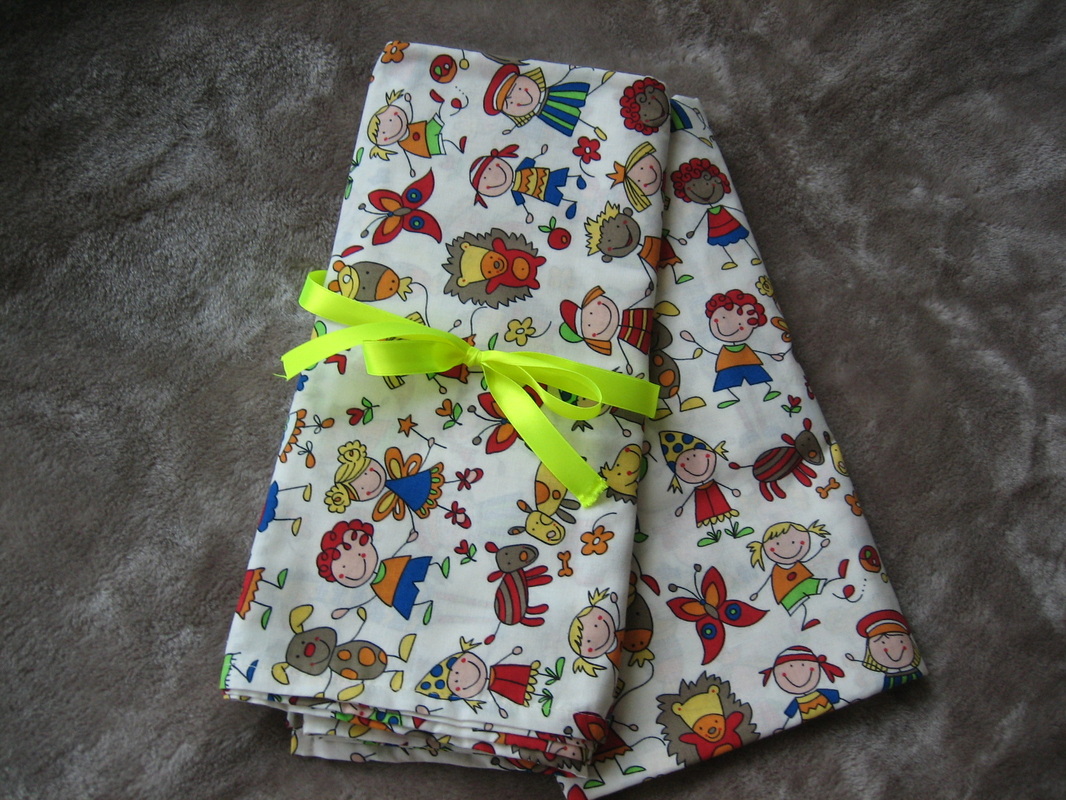
BABY Projects completed for my Customers.

|
|
|
Above are some of the Baby Bed Linen projects for customers.
For that Special Gift please contact us for advice and prices. Your fabric or ours!
For that Special Gift please contact us for advice and prices. Your fabric or ours!
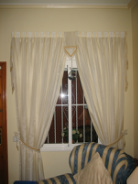
Kitchen window ,simplicity with a beautiful voile fabric ..
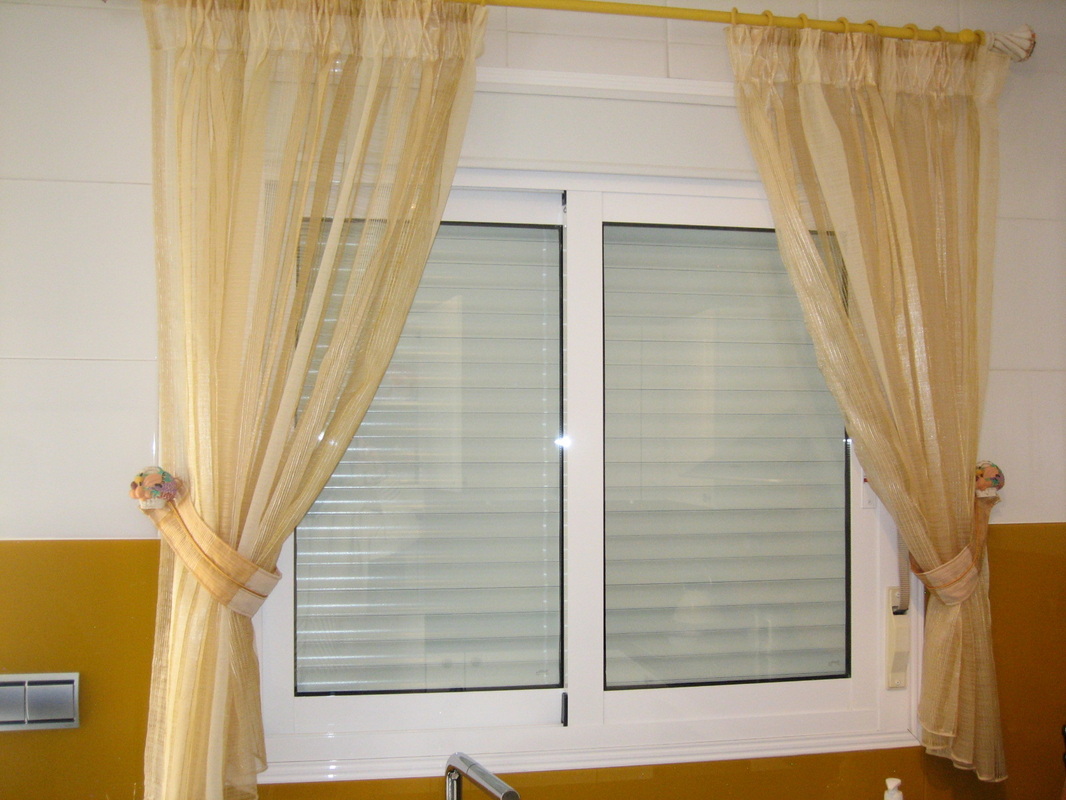
Tie backs with piping placed in the center. |
Dummy Blinds with the same fabric.This was an awkward corner window in the Dining Room
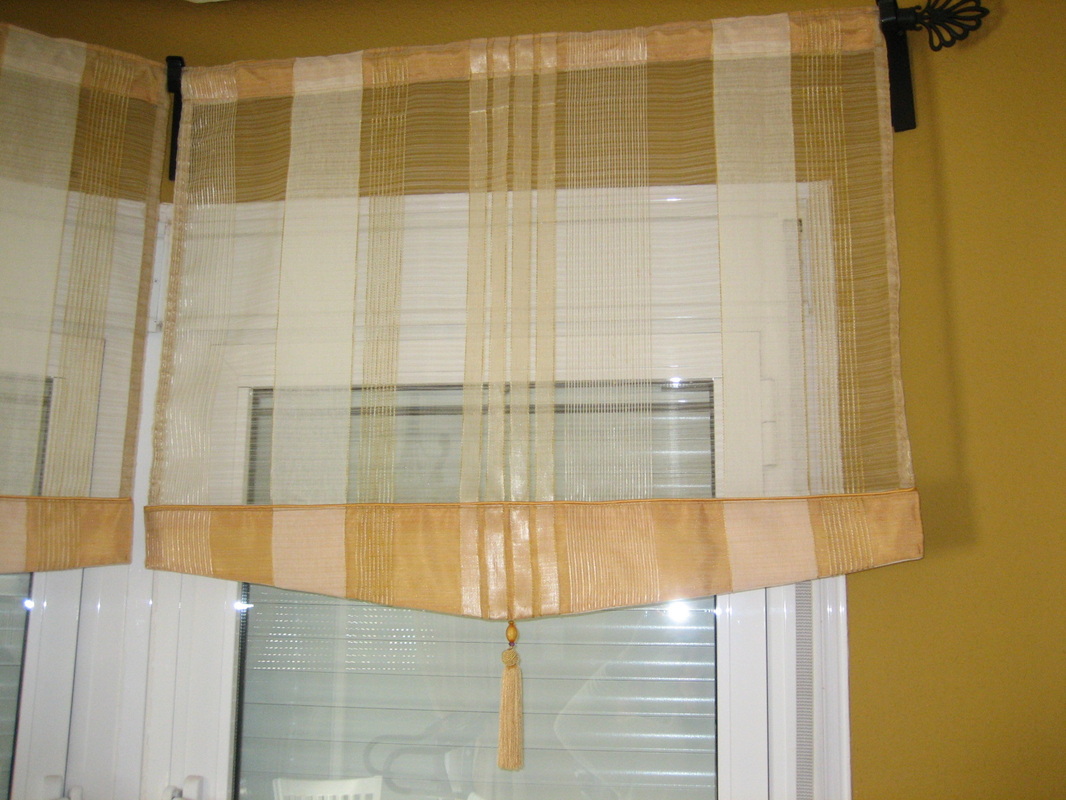
Interlining at bottom edge to give a little more weight. |
Terrace window in the Dining Room. Sorry about the exercise bike, must be over indulgence at Christmas.
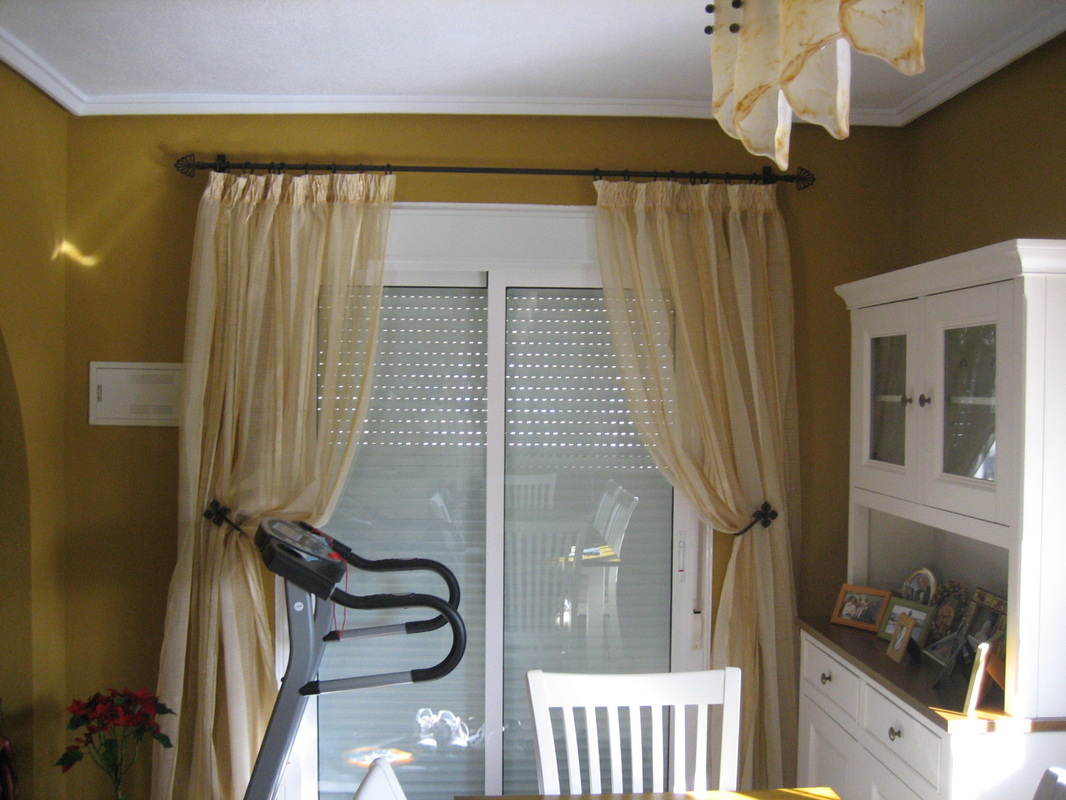
Fabric is leaded at the bottom |
|
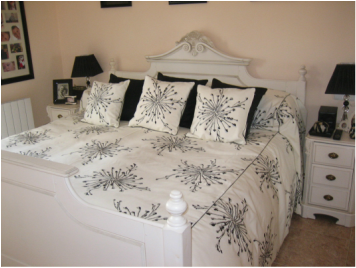
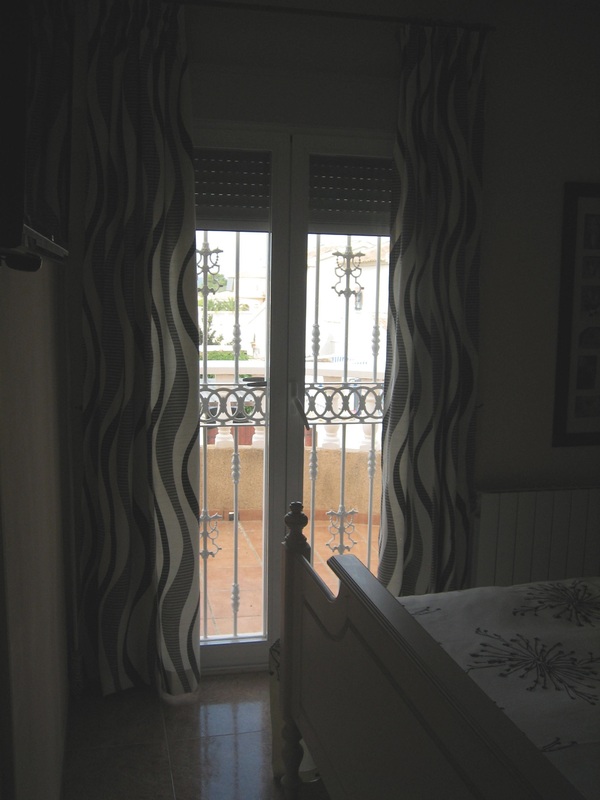
The above pictures are for one customer.
I enjoyed this project and the outcome was very pleasing for us both. The beds were both fitted covers with piped edges and the blind was a mock Roman Blind lined. |

Fitted cushions for my customer, who was very pleased with the out come.
It is a favorite color this summer and new designs are arriving this Autumn.
|
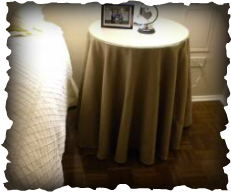
Simple idea to dress up an old table for the bedroom or lounge. 2 customers have requested this and were delighted with the finish |
|
Below you will see a few ideas for dressing your windows with many more to follow.
Mix and Match
Just look and see how many different fabrics you can put together to make that Special Room. Today we are led to buy what the shops offer you. Many go for the Black & White, Coffee & Cream and Blue & Green. These are found in a million homes. Why not be different and have your ideas in a design for your room. It isn't hard to do. First, think, of different textures, fur , silk, weaves. Then think of a design, stripes, spots, floral abstract and plain. Then think of additions , such as , tasles, ribbons, beads, borders, piping and patchworks. Gather samples, this is easy to do from the internet and shops. One thing a room always needs and that is plants. Also, mirrors add space, light and can be an impressive feature on a large wall. There are so many wall arts now to choose from. but I will be giving you some ideas on making your own for a fraction of the cost. BEDROOM CURTAINS WITH DUMMY BLIND

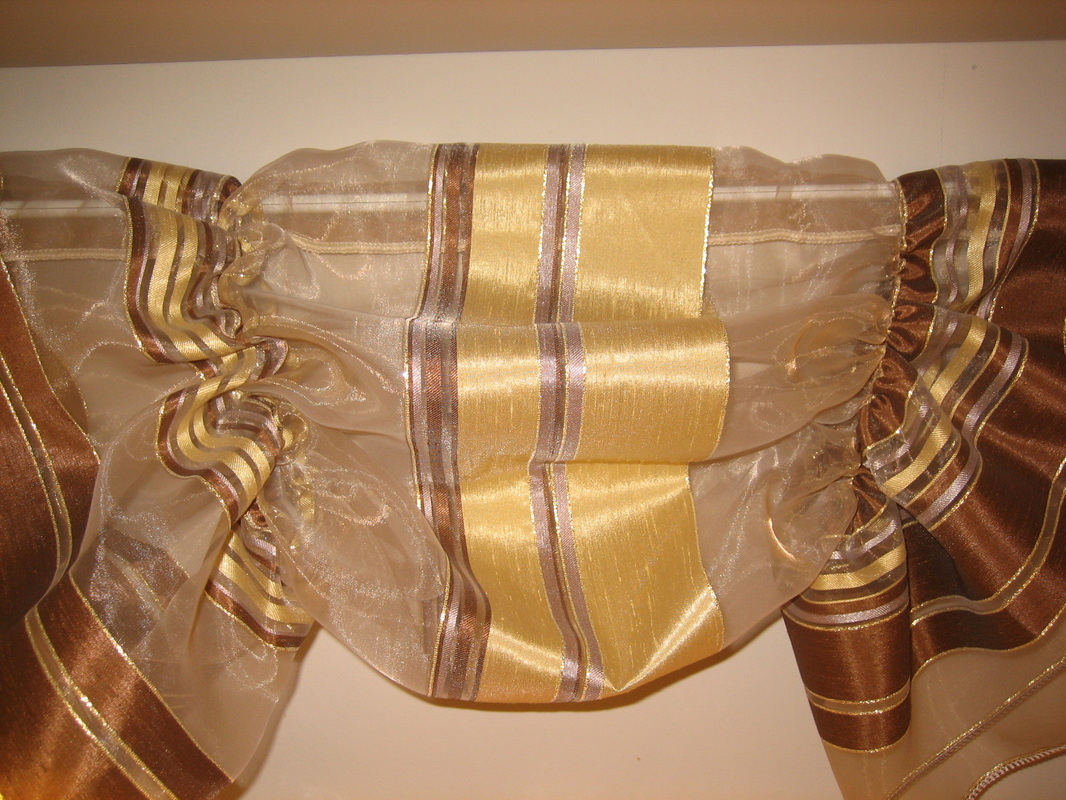
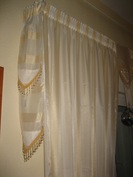
Here you can see bedroom curtains and a dummy blind in a rich ruby Voile. The Pelmet has a center piece hand sewn in beads and a tassel. The blind is attached by Velcro to a simple batten. It is finished with a fringed edge to match the Pelmet. DOUBLE LAYER CURTAINS
Create your own stunning design
As shown in the image, a self design by a customer. Tie Backs are made up on cream silk with edges of brilliant amber and crystal beading. Side and top panels are made up of the same fabric as the curtains. They are attached to the curtain track by using Velcro. The top curtains are in Voile, cream with a light gold stripe. The under curtain is a sheer white synthetic fabric. Because of this design you can change the look of the curtain, by opening and closing each layer. |
NEW FROM OLD...
Fancy a change of curtains but still like what you have, then why not revamp them.
This is easier than you think, low cost and takes very little time and effort. 1.. Reline with a contrasting colored fabric but bring the fabric over to the right side of curtain down the sides. With any fabric left over make some cushion covers. 2.. Buy a wide border print in a heavy fabric could be with tassles or a weave and sew along bottom edge or sides. You can make tie backs with this and you could also just add tassles along the top. 3.. If you have no pelmet why not add one in a contrasting color. You can fix it with a pelmet rod or make a hardboard cut out. This can look really classy and best to cover with a thin foam for a padded look and place fabric over. BEADED TIE BACKS
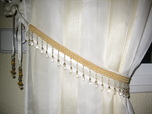
Close up of Tie Back
There are many designs for tie backs. The simplest of Tie Backs can be embellished with a fringe, braids, buttons covered with fabric, cord or tassels, contrasting or coordinated colors. To show them here is impossible but please email us and we can forward you some ideas, when designing your soft furnishings. SHOWN BELOW IS MY DESIGN CALLED WINGS
Add a touch of elegance or go for the dramatic. The choice is yours. Let us guide you when creating your furnishings. Swags, Tails and Wings are just a few choices. Traditional or modern, either will give a superb finish to your dressed window . |
You will find a contact form below.
DISCLAIMER OF WARRANTIES; LIMITATION OF LIABILITY
The site and the content are distributed on an "as is, as available" basis. Needle & Threads nor any provider of third party content, nor any of their respective agents (i) warrants that the service will be uninterrupted or error free; (ii) makes any warranty as to the results to be obtained from use of the site, (iii) makes any warranties of any kind, either express or implied, including, without limitation, warranties of title or implied warranties of merchantability or fitness for a particular purpose, with respect to the service, any content or any products or services sold through the service or (iv) warrants that any files available for downloading through the site will be free of viruses or similar contamination or destructive features. You expressly agree that the entire risk as to the quality and performance of the site and the accuracy or completeness of the Content is assumed solely by you.
Neither Needle & Threads nor any third party content provider, nor any of their respective agents shall be liable for any direct, indirect, incidental, special or consequential damages arising out of the use of or inability to use the site, even if such party has been advised of the possibility of such damages.
Some jurisdictions do not allow exclusion of implied warranties or limitation of liability for incidental or consequential damages, so the above limitations or exclusions may not apply to you. In such jurisdictions, the liability of Needle & Threads, third party content providers, or their respective agents shall be limited to the greatest extent permitted by law.
NEEDLE & THREADS www.needleandthreads.weebly.com .. 2011..
.
