
LIBRARY. PAGE 1.
For any other information there will be a list that you can refer to and if you wish I can send it to you, when you use the contact form within the site. Thank you.
Tips & Tricks
1.. When velvet clothes become shiny and/or "seated", spray item with a fine mist, brush up against the pile with a nail brush and leave overnight. It is probably safest to test this on a hem first.
· 2.. Use sandpaper to remove a stubborn mark from a felt hat. If this does not work get a felt tip pen in a matching color and draw over the offending mark.
· 3.. If you need to remove a pencil mark from embroidery (or indeed from any fabric), take a small piece of dough from a loaf of white bread, knead with fingers and then rub gently over the pencil mark, which should disappear. This can also be used on wallpaper.
4.. Use a piece of white chalk to remove marks from white material.
5.. Snags in woolen clothing can be hidden by taking a needle and thread and making a loop. Put needle down through material next to snag, place the offending snagged wool through the loop of thread and continue to pull the needle through to the back of the material. This will pull the snag through to the back of the garment where it cannot be seen.
6.. To make a hat smaller place small pieces of adhesive draft excluder underneath on the petersham inside the hat brim.
********************************************
Opposite you will find a very easy pattern in p.d.f. format for a Poncho. This is very quick to make and with Winter coming it would make a very good gift.
Enjoy
|
| ||
|
DARTS.
Here is a p.d.f file to help you with making darts and understanding the pattern directions. |
| ||
|
PIPING
Not too sure how to do this or just a little nervous, don't be! This is simpler than you think. On the right is a pdf file for you to download, so simple to understand just follow the instruction and you will be glad you did. Piping can give a very professional looking finish to any project. Enjoy! |
| ||
|
SEAM ALLOWANCE GUIDE Using a strong white card create the guide you see to the right. This is so handy when creating hems or marking out seams. You can move the card along as you mark out the measurement by ironing or marking with tailors chalk. If you are left handed reverse the chart, this will make it easier when using the iron to press. |
| ||
stripes
Stripes are one of the easiest ways to balance awkward proportions .Hang broad horizontal stripes at a narrow window and you instantly increase its sense of width. Use vertical stripes where the ceiling is low and you will add more height and open up the space. The beauty of stripes is their simplicity, so don't undermine that by overdressing the window: stick to neat blinds and gathered panels that screen the light without too much fuss. Roller blinds are the simplest of all effects, worked with a basic cord-and-cleat mechanism that adds a practical, almost nautical look. For a softer, more rustic style, use traditional country fabrics such as quilts.
Try neat, striped fabric in practical areas such as kitchens, bathrooms and utility rooms. Use horizontal stripes to widen a narrow window and vertical stripes to add height.
When making roller blinds, use reversible fabric if you don't want to lose the pattern where it rolls up at the bottom.
Individual blinds are practical for a run of windows or for glazed doors, as each one can be worked separately to let you control the level of light and privacy.
Make use of existing "finished" panels of fabric such as bedspreads and tablecloths by recycling them as simple curtains and blinds.
**************************************************************************************************************************************************
TIP FOR BEGINNERS USING A SEWING MACHINE
USING A SEWING MACHINE FOR THE FIRST TIME CAN BE A LITTLE FRIGHTENING, SO FAMILIARIZE YOURSELF WITH THE MACHINE. GET TO KNOW THE FEET SUPPLIED AND THERE USES. YOUR MACHINE MAY HAVE DIFFERENT STITCHES BUT GET TO USING THEM AFTER YOU HAVE DONE THIS SIMPLE EXERCISE
HERE IS A GOOD WAY TO GET USE TO STITCHING.- BUT REMEMBER - ALWAYS... NEVER TO PLACE YOUR FINGERS IN FRONT OF THE NEEDLE WHEN SEWING. GUIDE THE FABRIC BY PLACING YOUR FINGERS EACH SIDE OF AREA WHERE THE SEWING IS TAKING PLACE. WHEN YOU HAVE FINISHED SEWING ALWAYS TURN THE MACHINE./
FIRST.... DO NOT THREAD THE MACHINE OR USE FABRIC. SECONDLY. GET YOUR SELF A CLEAN PIECE OF PAPER AND PLACE IT UNDER THE FOOT, AS YOU WOULD A PIECE OF FABRIC. NOW, SLOWLY PRESS ON THE FOOT PEDAL AND GET USE TO A SLOW SPEED AND GRADUALLY INCREASE PRESSURE, AND THEN SLOW DOWN AGAIN BY RELEASING PRESSURE ON THE FOOT PEDAL. CARRY ON DOING THIS AND ALSO TURN THE PAPER SLOWLY TO GET USE TO SEWING AROUND CORNERS. SEW ALONG THE STRAIGHT SIDE OF PAPER AS IF MAKING A SEAM. ON YOUR MACHINE YOU WILL HAVE A REVERSE BUTTON GET USE TO USING THIS AT THE END OF YOUR SEAMS, THIS IS A CAST OFF TO STOP SEAMS COMING APART.
****************************************************
Apple Blossom Time Part
FREE X STITCH PATTERN PART 1. APPLE BLOSSOM I know some of you would like to have some more free X Stitch patterns. Opposoite you will see a pdf file for Apple Blossom. This pattern can be used as a border to another file which I will place below for you. Enjoy. |
Apple Blossom Time Part 2.
If too small to read enlarge the view to 150 and you can print in 2 sections. If you have a problem drop me a line and I can send it to you.
| ||||
|
Fancy Ruffles.Here is a fancy fashion idea for you.This would make a fun Present for the young or even the young at heart. Go have a peep and you could make this gift in no time at all.. Download the pdf file on the left. | ||
|
NEEDLE POINT FOR THE BEGINNER. To the right you will find a pdf file showing you how easy it is to do needle point. How about you making some simple gifts. For example, Book Markers, Glass Case, Cushion Cover, Place Mats, Serviette Rings. There are many more things you could think off I am sure. Just click on the file and save. Enjoy.
|
| ||
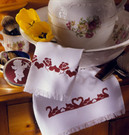
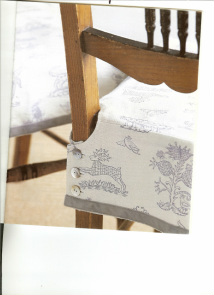
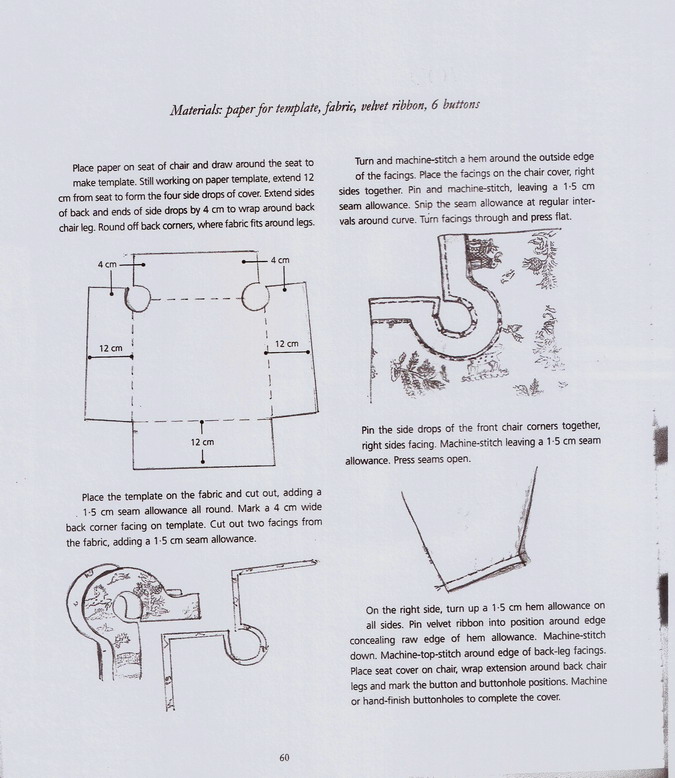
FREE PATTERN FOR SEAT COVER
|
|
